Effective Tile Removal Methods: And how you can do it yourself!
[dropcap]R[/dropcap]emoving tiles may seem like a messy and difficult job however there are various methods for removing tiles that anybody can do at home with the right tools and equipment. Whether you are removing tiles from the floor in a large living area or the wall in a small bathroom, getting the preparation right and ensuring that you have the right equipment to do the job is key to getting a great result and having the job done before you know it. Here are some of the most effective methods for tile removal.
Method 1: Use a Jackhammer
If you want to make the job of removing tiles as easy as possible, then often the most effective way to do this is to use a jackhammer.
For large floor areas, a tile removal package from Centenary Hire is certainly your best option. This package includes everything that you need for the efficient and easy removal of tiles including a trolley-mounted 15kg Makita jackhammer that uses either a 115mm wide thin blade or a sturdy 75mm wide chisel. In some cases, the 115mm wide thin blade is also effective for cleaning up the mortar residue left on the concrete floor.
The trolley mounted jackhammer not only allows the operator to stand upright, thus saving your back, it also bears the weight of the jackhammer and makes it easier to control the angle of attack onto the tiles. The combination of these features reduces the physical strain on the operator and increases the efficiency of the tile removal process.
Often after having removed the tile itself there will still be residual grout or adhesive on the concrete floor that won’t come up with the tile removal tools. To achieve a clean surface you will require a Floor Grinder Kit or a Meteor Floor Grinder Kit to grind away the product left on the floor leaving the surface ready for the next floor covering.
For tiles on the wall in smaller areas like the kitchen, bathroom or laundry there are smaller & lighter jackhammers such as a 3.5kg Milwaukee Jackhammer or a 6.0kg Milwaukee Jackhammer which are suitable for the task. Both of these jackhammers have the option of point and chisel attachments while the 6.0kg Milwaukee Jackhammer also has and an angles 75mm wide chisel specifically designed for removing wall tiles.
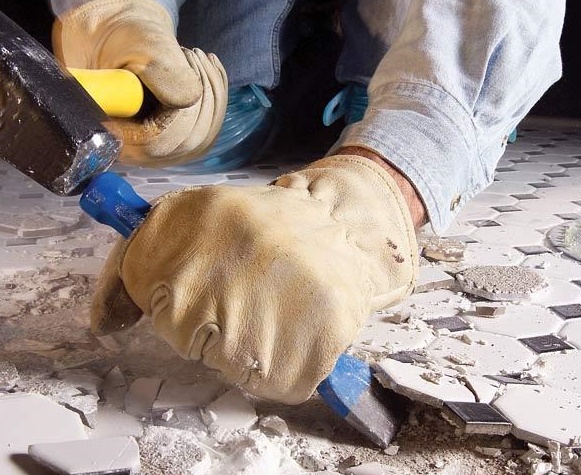
Method 2: Hammer & Bolster
Suitable only for small areas, removing wall or floor tiles can be achieved by using a hammer and bolster set. Start by positioning the bolster blade on a grout line at no more than 45 degrees off the tile surface and strike it with the hammer… it may take several hits. If you’re lucky the tile may “pop” off as a single piece. Once the first tile is removed you can rest the bolster blade on the surface the tiles are adhered to and continue hammering into the other tiles. If the tiles are not ‘popping’ off easily, consider striking each tile in the middle with the hammer to make smaller sections of tile to remove.
If you are only wanting to remove one or two damaged tiles for example, chasing out any grout surrounding them will help to restrict any impact used to remove them from effecting the other tiles. This can be done with a small grinder or another small tool designed for this. It will also help them to come off more easily as part of the holding bond has been broken. Then they can be removed with a hammer and bolster or sometimes even a rigid putty style tool will work.
Method 3: Tackle the Underlay
Sometimes tiles are installed over top of timber floors and if this is the case then it is most likely that the tiles have been laid onto a cement board or similar underlay product. It’s usually easier and often cheaper, to remove the underlay completely rather than trying to get each tile off. To do this, you can begin by removing a few of the tiles using one of the methods mentioned above until the underlay material is exposed. Then it is a matter of breaking through a section of the underlay so that you have a purchase point from which to start pulling it up. Keep in mind that the underlay will be secured to the base floor material as well.
If you follow the advice here, you should find that tile removal has gone from a hard job, to a slightly less hard job!
DO YOU WANT TO USE THIS ARTICLE IN YOUR NEWSLETTER OR WEBSITE?
You can, as long as you include the following text in its entirety:
Centenary Hire is a Tradesmen & Weekend Warrior’s best friend. Our ever-increasing range of hire equipment consists of modern tools, machinery, scaffold, access equipment and site services all of which are aimed at helping you get the job done right – the first time. Our friendly staff can help you to choose the right equipment for your project or you can view & book your equipment online now at www.CentenaryHire.com.au. Drop into our store at Sumner Park or request an equipment delivery as our efficient transport service extends well beyond the limits of Brisbane daily.